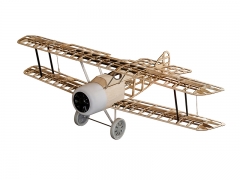
Sopwith Camel 1.5M 1520mm (60") Balsa Wood with Fiber Glass Cowl Gas or Electric Aircraft

Contact UsCustomer Reviews

Sopwith Camel 1.5M 1520mm (60") Balsa Wood with Fiber Glass Cowl Gas or Electric Aircraft

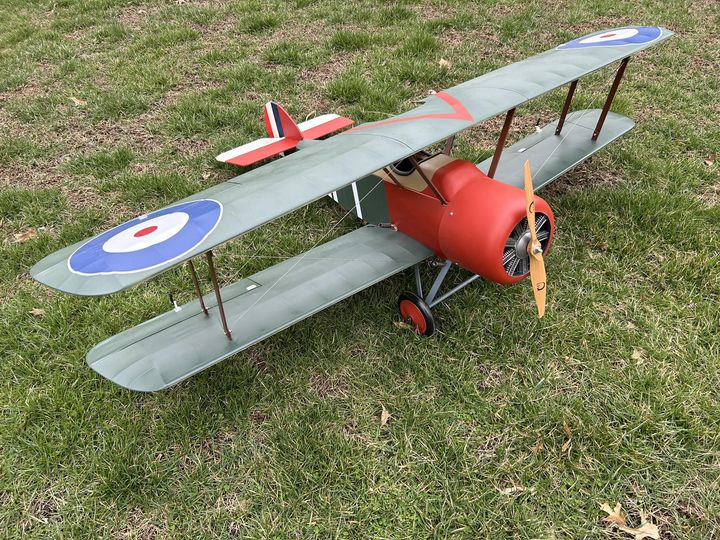
Customer completed kit
Our Price:

$199.99

Optional Versions
Quantity

OUT OF STOCK


Availability No items available
Weight 7.80 lbs
SKU DW-S11FG-Camel

Sopwith Camel 1.5M 1520mm (60") Balsa Wood with Fiber Glass Cowl Gas or Electric Aircraft 

Redwing RC is proud to partner with Dancing Wings to bring you another great flying balsa wood Warbird Aircraft to our lineup. Dancing Wings, established in 2002, is a manufacturer with small beginnings, initially only manufacturing power systems and accessories for RC models. They've now grown into a large manufacturer, having hired experienced designers and engineers in recent years, so that they could start to widen the product line. The ranges now include some fine balsa kits, static models, electronics and more...

History: The Sopwith Camel is a British First World War single-seat biplane fighter aircraft that was introduced on the Western Front in 1917. It was developed by the Sopwith Aviation Company as a successor to the Sopwith Pup and became one of the best known fighter aircraft of the Great War.

Model Specifications:

  • Wingspan: 1520mm (59.8")
  • Length: 1020mm (40.2")
  • Flying Weight: 2.7-3.3kg (Approximately)
  • Build Difficulty: Challenging
  • Flying Difficulty: Easy 

Kit Versions (use dropdown to make your selection):

  • Balsa Kit only
  • Kit+Film (2M Silver and 4M Green)
  • Kit+Motor (3520)+Prop
  • Kit+Motor + Prop+ ESC (40A)+Servos (4x17g)
  • Kit+Motor+Prop+ESC+Servos+Film

Suggested Power System:

  • Motor: 3520 or 4240) /8-10cc
  • ESC: 40-60A 6S 
  • Servo: 17g*4pcs
  • Propeller: 14-15 inch
  • Battery: 6S 2600-4000mAh

NEED TO COMPLETE:

  • Battery: 6S 2600-4000mAh (Recommended)
  • Propeller:  14-15inch (Recommended)
  • Transmitter/Receiver: Greater or equal to 4-Channel

$30 Flat rate shipping lower US 48 only. Contact us at [email protected] to calculate international shipping cost.


: *
: *
: *
 

Safe Parallel Charge Board for 2S JST-PH

Safe Parallel Charge Board for 2S JST-PH

EPB-2S-JST-PH

$11.99

ESC (10A 20A 30A 40A) E-Power for RC Electric Airplane, Heli or Drone Models

ESC (10A 20A 30A 40A) E-Power for RC Electric Airplane, Heli or Drone Models


Overview

The new Dualsky XC-45-LITE speed control is economically priced and perfect for 2-3S LiPO powered aircraft. The Dualsky XC-45-LITE speed control is compatible with the Dualsky ProgCard V2 and has a burst rating of 60A. The BEC is rated at 5.2V 3A and will punch this out all day unlike other low priced speed controls.

This ESC works well with the Dualsky XM 3542, 950KV motor


Specifications


  • Dimensions: 67x 25x 7mm(L x W x D)
  • Weight: 38g (with wires)
  • Number of Cell:
    • LiPo 2-3s, 7.4-11.1V
  • Resistance(Ri)(Ohm): 0.0026
  • Max Cont.  Current & Max Cont.Output: 45A, 500W
  • Max Burst Current & Max Burst Output: 60A, 666W
  • BEC / Dissipative Power: 5.2V/3A (Linear)
  • Programmable: Throttle + ProgCARD V2
  • Signal Wire: 300MM JR


DW-ESC

$21.99

Lemon RX DSMP 7-CH RECEIVER (DSMX/DSM2 COMPATIBLE)

Lemon RX DSMP 7-CH RECEIVER (DSMX/DSM2 COMPATIBLE)


Description:

Lemon Rx DSMX Compatible 6-Channel Receiver + Lemon DSMX Compatible Satellite


Type: DSMX Compatible Full Range Receiver
Number of Channel: 6
Modulation: DSMX Compatible (Also DSM2 backward Compatible)
Band: 2.4 GHz
Dimension: 25(L) x 18(W) x 11(H)  mm
Weight: 4.5 grams + 2.5 grams
Voltage Range: 3.45 - 8.4 V


Highlight
- FailSafe for all channels via press of a button
- DSMX Satellite port


Understanding the receiver


Setup Instruction

Binding

  1. Plug bind plug to the receiver.
  2. Provide power to the unit. LED flashes quickly.
  3. Enable bind mode in transmitter and ensure distance separation of 2 meters from receiver. Solid LED light means binding is completed.
  4. Remove bind plug.

Setting Failsafe

  1. Start by binding the receiver to the transmitter in the normal way and proceed as follows to set failsafe
  2. Ensure that transmitter and receiver are turned on.
  3. Insert bind plug into the receiver (Note: to set failsafe, bind plug is applied only when the receiver is turned on).
  4. Set transmitter controls to the desired failsafe positions.
  5. Press the side pushbutton to memorize failsafe settings.
  6. Observe that the green light at the end of the receiver turns on to indicate failsafe is set. (Repeat step 4 will cause the LED to turn off which means failsafe is disabled).
  7. Remove bind plug.
  8. Disconnect the power for at least 2 seconds and then reconnect the power again. Test failsafe by turning off the transmitter.


LM-0081

$21.99